Member Security
By default, all roles assigned to the data model can see all members of a hierarchy.
- Enable: Once a role is enabled for a specified member, it is also disabled for all other members; the role will only have access whichever members have been manually enabled.
- Disable: However, when a role is disabled for a selected member, the role remains enabled for all other members; the role will have access to all members in the data model, except those that for which it has been manually disabled.
Note: Attribute security can work on any supported model in the system including MS OLAP, Tabular, SAP BW and SAP Hana models and cubes.
Row Level Security
Since member level security controls a fine grain of selection with dimensions, it is sometimes referred to as "row level" security, because it allows developers to effectively control each row of data presented to end users. This is different to column level security.
How to set Member Security
There are two ways to define member security:
- Basic: select the role, hierarchy, and then member elements that should be enabled or disabled for the selected role.
- Script: select the role and hierarchy, then build a custom set in the Security Script editor. Click here to learn more.
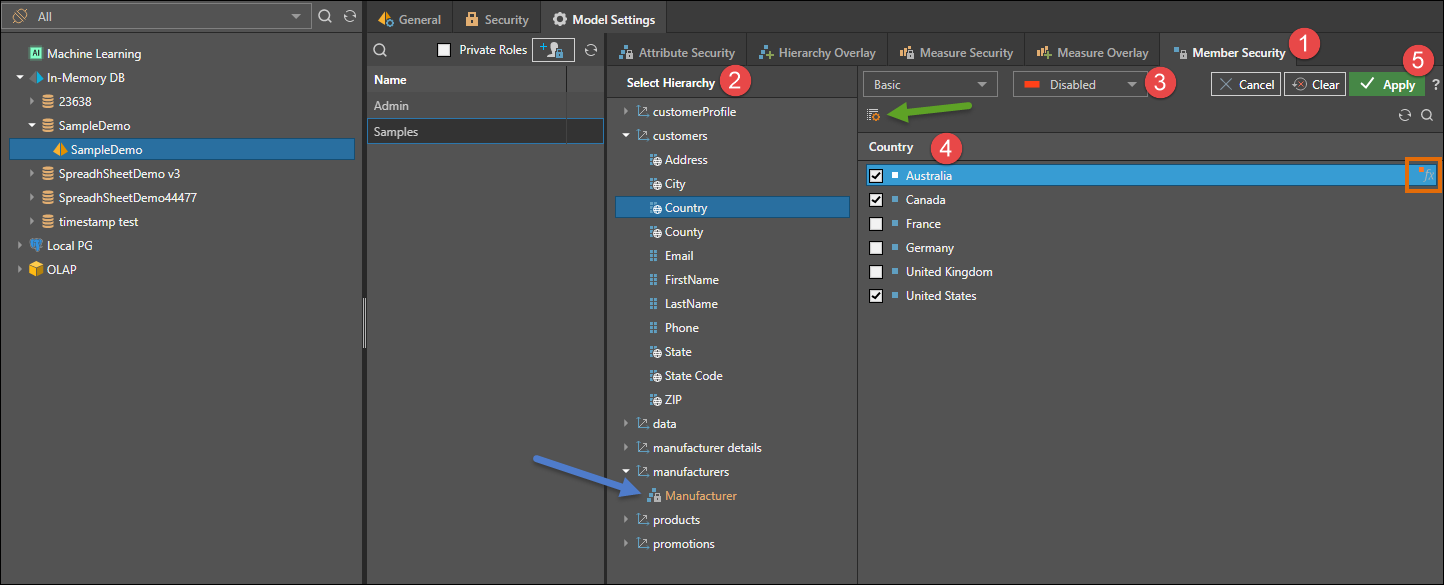
Basic Member Security
- With the relevant data model and user role selected, open the Member Security panel.
- From the Select Hierarchy panel, choose the hierarchy for which you want to configure member security.
- Choose whether to enable or disable the chosen member elements.
- Select the member elements for which you want to set security.
- You can choose multiple members, and you can use the List Builder (green arrow) to import a list of members (rather then manually selecting them).
- You can configure Functional Selections on given member element by hovering over it and clicking the Fx icon (orange highlight).
- Click Apply to save changes.
- To continue setting member security for the selected role, repeat steps 2 - 5.
- Hierarchies for which member security has been set will be displayed in orange font with a padlock icon (blue arrow).
In the example below, the members Australia and Canada, and United States within the Country hierarchy are disabled for the Samples role. Because of the relationships in the database, all geospatial locations within the United States will automatically be disabled for EMEA as well: